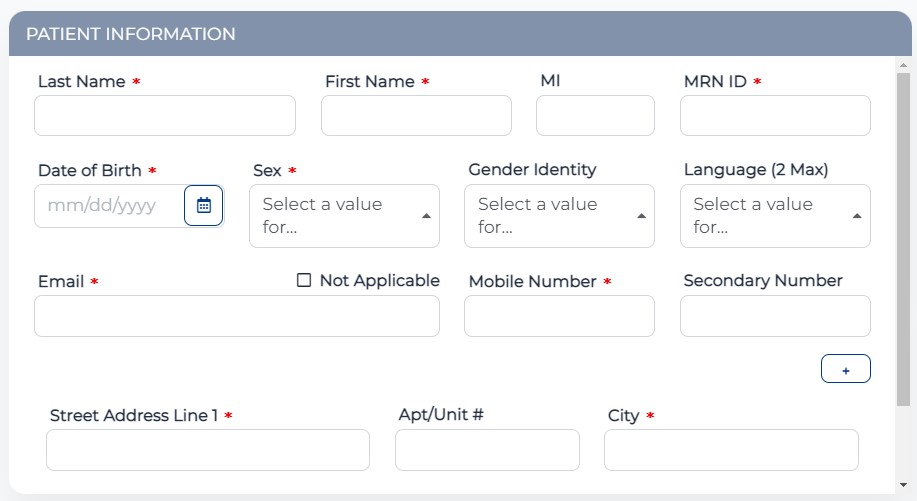

You can save an enrollment as a draft at any point during the enrollment process as long as minimum patient data has been entered (First Name, Last Name, DOB and Sex).
![]()
You can then re-open the enrollment from the ‘Draft Enrollments’ tab later.
Enrollments will also be auto-saved every 90 seconds once the minimum patient data is entered.
Draft Enrollments can also be deleted. ![]()
NOTE: If an enrollment is saved as a draft any device information is removed and will need to be re-entered when completing the enrollment. This prevents your inventory being allocated to draft enrollments.
Easily add files to the enrollment. Driver’s license, insurance card, face sheet, medical records, prior testing or other items.
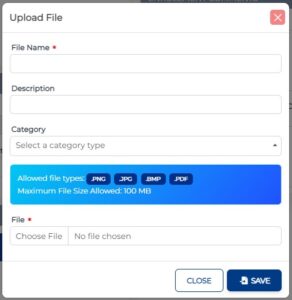
Allowed file types: PNG, JPG, BMP, PDF
Maximum file size: 100MB
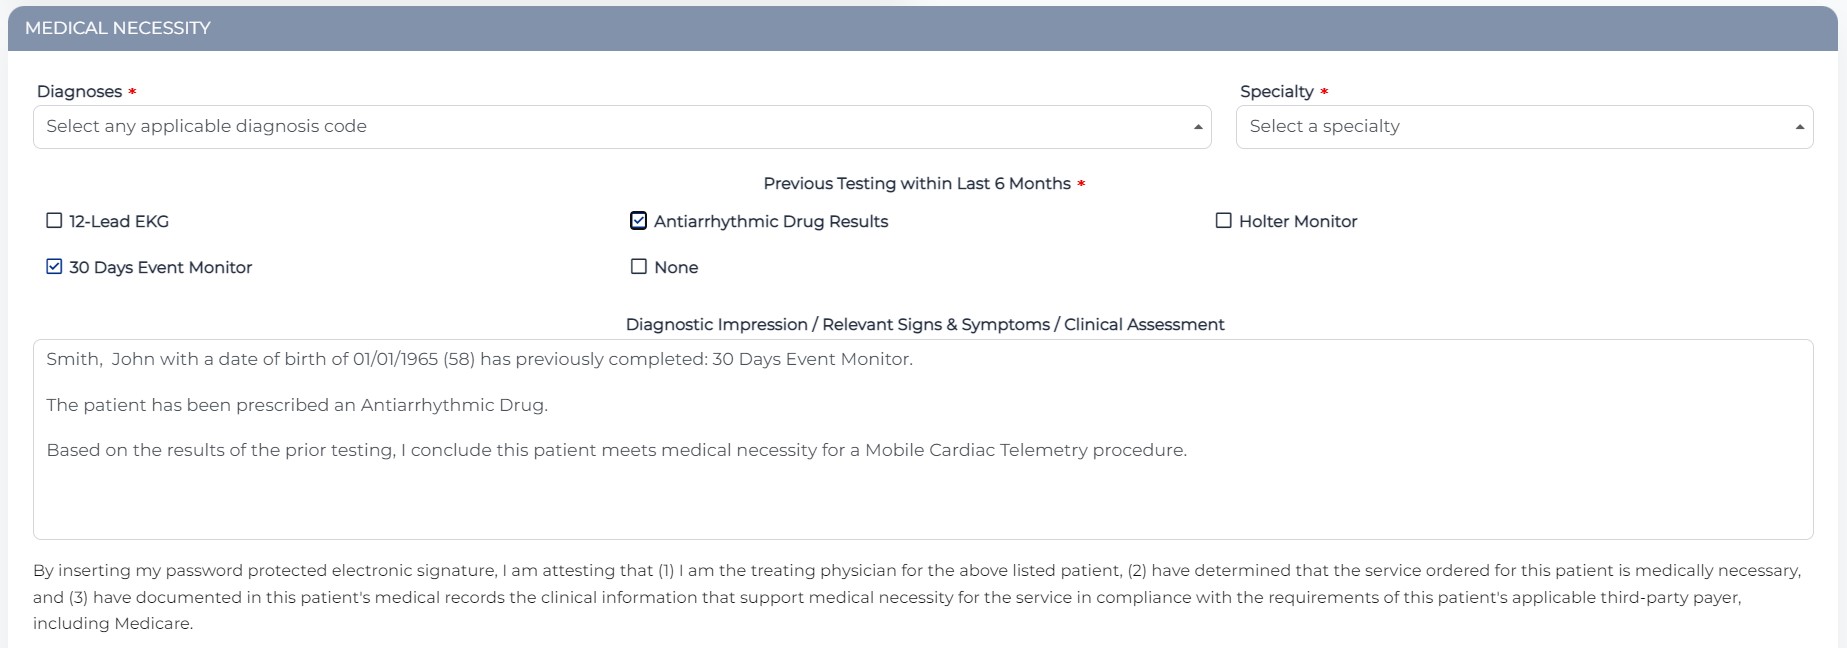
The text in the Medical Necessity section will auto-populate with information that has been entered in the form and selected checkboxes. The narrative produced can be edited by the user as needed.